


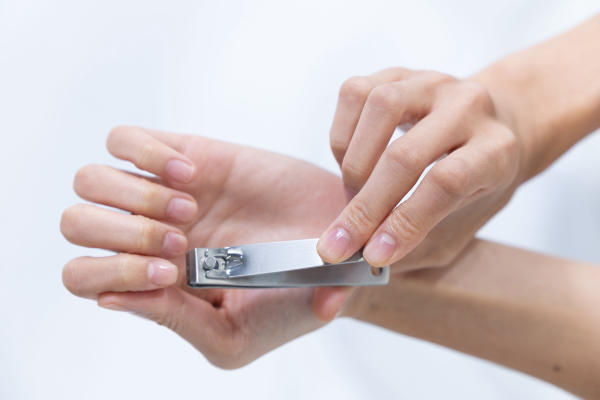
Nail clippers are a commonly used tool for maintaining clean and neat nails. However, many people underestimate the importance of keeping these seemingly innocuous tools clean and hygienic. In this article, Nghia Nippers will explore the reasons why it is crucial to maintain clean nail clippers, the risks associated with using dirty ones, and provide a step-by-step guide on how to sterilize nail clippers, properly clean, and maintain them for optimal hygiene.
1. Why clean nail clippers
1.1 Importance of hygiene and infection prevention
Hygiene is a fundamental aspect of personal care, and it extends to the tools we use on our bodies. Unclean nail clippers can harbor harmful bacteria, fungi, and viruses that may lead to various infections. When we trim our nails, small particles of dirt, dead skin, and microorganisms can accumulate on the clippers, creating an ideal environment for pathogens to thrive. This is why learning how to sterilize nail clippers is essential to ensure the safety and well-being of our nail care routines.
1.2 Risks of using dirty nail clippers
Using dirty nail clippers can lead to several health risks and nail problems:
- Infections: When you use contaminated nail clippers, you expose your nails and surrounding skin to harmful bacteria, viruses, and fungi. This can result in various infections, including paronychia (infection around the nail), cellulitis (skin infection), and nail fungus.
- Nail Fungus Spread: Nail fungus is highly contagious, and dirty nail clippers can facilitate its spread. If you have a fungal infection on one nail and use the same clippers on other nails without cleaning them, you risk infecting healthy nails.
- Ingrown Nails: Unclean clippers can cause uneven cuts, leaving sharp edges or irregular shapes. Such nail trimming can lead to ingrown nails, where the nail grows into the surrounding skin, causing pain, redness, and inflammation.
- Reduced Nail Health: When nail clippers are not cleaned and maintained, they may become dull or damaged. Using dull clippers can result in uneven and rough nail edges, which may lead to nail weakness and susceptibility to breakage.

1.3 How long does nail fungus live on clippers
Nail fungus can survive on contaminated nail clippers for a significant amount of time, depending on various factors such as the fungus's type and environmental conditions. In some cases, fungal spores can remain viable on surfaces for months. To prevent the spread of nail fungus, it is crucial to disinfect your nail clippers thoroughly after each use and avoid sharing them with others.
Maintaining proper nail clipper hygiene through regular cleaning, disinfection, and proper storage is vital to ensure healthy and beautiful nails while minimizing the risk of infections and other nail-related issues.
2. Tools and materials for cleaning nail clippers
2.1 Essential cleaning tools and solutions for cleaning nail clippers
- Rubbing Alcohol or Hydrogen Peroxide: These solutions are effective for disinfecting nail clippers and killing harmful bacteria, viruses, and fungi that might be present on the surface.
- Cotton Pads or Balls: These soft and absorbent materials are used to apply rubbing alcohol or hydrogen peroxide to the nail clippers for cleaning and disinfection.
- Small Cleaning Brush: A soft-bristled cleaning brush is essential for removing debris, dirt, and nail clippings from the crevices and blades of the nail clippers.
- Mild Soap or Dishwashing Liquid: A gentle soap or dishwashing liquid can be used to clean the nail clippers before disinfection. It helps remove dirt and oils from the surface.
- Clean, Dry Cloth: Use a lint-free cloth to dry the nail clippers after cleaning and disinfection. Make sure the cloth is clean and free from any contaminants.
2.2 Non-abrasive materials for safe cleaning of nail clippers
- Soft Cloth or Microfiber Cloth: Use a soft cloth or microfiber cloth to wipe down the surface of the nail clippers. Avoid using abrasive materials like steel wool or rough fabrics that can scratch the clippers' surface.
- Q-tips or Cotton Swabs: These small, soft-tipped tools are helpful for cleaning hard-to-reach areas and corners of the nail clippers without causing damage.
- Toothpicks or Wooden Sticks: Use these non-abrasive tools to gently dislodge any debris or dirt stuck in tight spaces of the nail clipper without scratching the metal.
- Antiseptic Wipes: Antiseptic wipes are convenient for quick cleaning and disinfection when you don't have access to rubbing alcohol or hydrogen peroxide.
>>> Read More: How to sharpen nail clippers
3. Step-by-step guide on how to clean nail clippers
Maintaining clean and hygienic nail clippers is crucial for promoting healthy nails and preventing infections. Regular disinfection is a fundamental aspect of nail clipper hygiene, especially given their frequent use and exposure to various contaminants. In the following sections, we will delve into the reasons why regular cleaning is important and provide a comprehensive guide on how to sanitize nail tools effectively
3.1 Disassembly (if applicable)
Before beginning the disinfection process, check if your nail clippers have removable parts. Some nail clipper models come with detachable components, such as a hinge pin or removable cutting head. If your clippers have these features, carefully disassemble them. Disassembling the clippers allows for better access to all surfaces and crevices, ensuring a thorough cleaning and disinfection.
3.2 Removing debris and rust
Once disassembled (if applicable), it's time to remove any debris, nail clippings, or dirt that may have accumulated on the clippers. Employing a small cleaning brush with soft bristles, meticulously scrub all parts of the clippers, with special attention paid to the crevices and blades. Dedicate ample time to this phase, ensuring the effective elimination of all particles and build-up.
Cleaning techniques for nail clippers can further enhance their hygiene. One method involves immersing the disassembled clippers in a mixture of warm water and mild soap for approximately 10-15 minutes. This aids in loosening any tenacious debris and facilitating a more thorough cleaning. After soaking, employ the brush once again to cleanse any residual residue.

Moreover, should you observe any indications of rust on the metal components of the clippers, addressing it becomes imperative before proceeding with disinfection. Rust has the potential to compromise the integrity of the clippers and foster an environment conducive to bacterial growth. Utilize a rust remover or a combination of vinegar and baking soda to treat the affected areas, delicately eliminating the rust.
3.3 Disinfection and drying
- Prepare the Disinfectant Solution
To effectively disinfect your nail clippers, you'll need a suitable disinfectant. Commonly used options include isopropyl rubbing alcohol (70% concentration or higher) or hydrogen peroxide. Both of these solutions have excellent antimicrobial properties and are effective at killing germs, bacteria, viruses, and fungi that may be present on the clippers.
Mix equal parts of the chosen disinfectant with water in a small container or bowl. This dilution helps reduce the potency of the solution, making it safer for the metal components of the clippers.
- Submerge and Soak
Dip the disassembled nail clippers into the disinfectant solution, ensuring that all parts are fully submerged. Let them soak for at least 10-15 minutes to allow the disinfectant to work effectively in killing any remaining germs and pathogens.
The disinfectant solution penetrates into hard-to-reach areas and eliminates any lingering contaminants, leaving your clippers thoroughly disinfected and safe for use.
- Air Dry
After the soaking period, remove the clippers from the disinfectant solution and place them on a clean, dry surface. Allow them to air dry completely before reassembling them (if applicable) or storing them away.
Air drying is crucial to avoid contamination from towels or cloths, which may introduce new germs onto the freshly disinfected clippers. Ensure that the clippers are completely dry before using or storing them to prevent any moisture-related issues, such as rusting.
4. Best practices for nail clipper hygiene

4.1 Storing and maintaining nail clippers
Clean and Dry Storage: After cleaning and disinfecting your nail clippers, store them in a clean and dry container. Avoid storing them in damp or humid environments, as moisture can lead to rust.
Keep Them Covered: If possible, keep the clippers covered or in a case when not in use. This protects them from dust and contaminants.
4.2 Sharpening or replacing blades
Sharpening: If your nail clipper blades become dull, you can try sharpening them using a sharpening stone or a nail clipper sharpening tool. Follow the manufacturer's instructions or seek professional assistance to avoid damaging the clippers.
Replacing Blades: Some nail clippers have replaceable blades. If sharpening doesn't restore their effectiveness, consider replacing the blades with new ones.
>>> Click now: How to use nail clippers
4.3 Cleaning different types of nail clippers
- Standard Nail Clippers: For standard nail clippers, follow the step-by-step guide mentioned earlier for cleaning, disinfecting, and drying.
- Guillotine Nail Clippers: Guillotine-style clippers have a hole where you insert your nail, and a blade slides across to cut it. To clean them, disassemble if possible, remove debris, disinfect, and air dry.
- Electric Nail Clippers: Electric nail clippers may have detachable heads or replaceable files. Follow the manufacturer's instructions for cleaning and disinfecting the removable parts.
- Toenail Clippers: Toenail clippers are often larger and sturdier. Clean and disinfect them the same way as standard nail clippers.
5. The high-quality products of Nghia Nipper
Clipper at Nghia is committed to providing you with high-quality, safe, and reliable products.
The Advance Self-Collecting Nail Clipper is a top-notch tool that offers innovative features for efficient and hassle-free nail care. This self-collecting nail clipper is designed to make your grooming routine easier and more hygienic. With its sharp and precise cutting blades, ergonomic handle, and built-in compartment for collecting nail clippings, it stands out as an excellent choice for those looking for a convenient and effective toenail clipper.
Maintaining clean nail clippers is vital for personal hygiene and infection prevention. By following steps on how to clean nail clippers and best practices, you can ensure that your nail clippers remain effective and safe to use, promoting healthy and beautiful nails. If you are looking for best high-quality nail clippers, Nghia Nippers's products are an excellent choice, known for their durability and precision.


